Installation and configuration Instructions for first run with Sample Reports:
** Note: These instructions assume the adapter has already been purchased and a subscription key is in your possession. If you lost your subscription key please contact us and you will be connected to a member of our team. We do not outsource your support experience. **
** Note: There is not a Power BI Desktop version for Mac. However, Mac devices and any device can access the reports once they are published to an internal or external web location. You can publish a Dashboard in Power BI that refreshes the data automatically. **
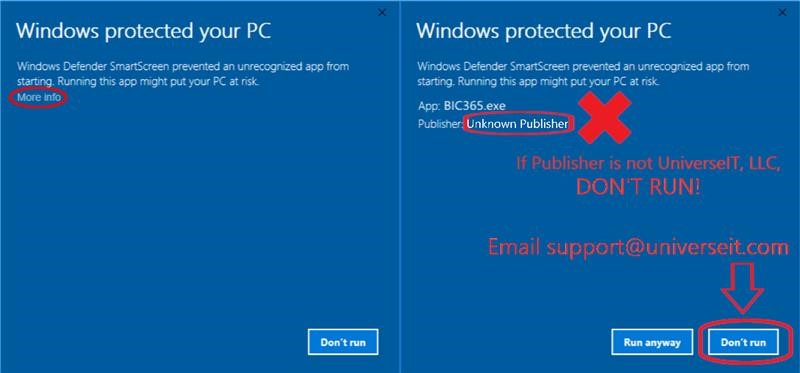
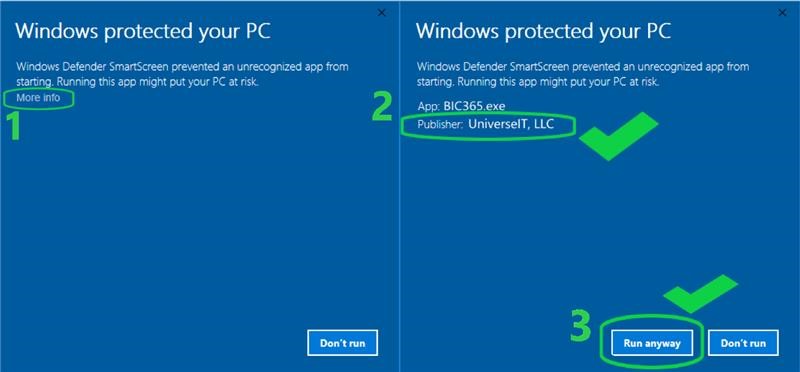
“Windows Defender SmartScreen prevented an unrecognized app from starting. Running this app might put your PC at risk.”
Click “More Info”. (located at the end of the paragraph) and you should verify the publisher as UniverseIT, LLC. If it comes up as “unknown” then you should NOT run it.
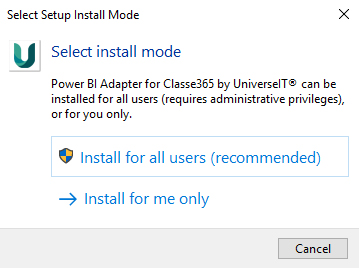
Select your preferred language and click “OK”. This language selection is only for the setup program. Power BI has its own language settings and the adapter will adjust to it automatically.
The option to create a shortcut will be enabled by default. Click “Next” to proceed or to disallow a shortcut to be created, uncheck the box on-screen, then click “Next”. This will allow a quick launch right into Power BI for Classe365.
Enter the subscription key that you received from UniverseIT, then select the desired attendance dates.
** Note: The longer the time period you select, the longer the query will run. **
** Note: Attendance START date is REQUIRED. If attendance END date is not selected, the application will use the default end date, which is 30 days following the attendance start date entered (attendance start date + 30 days). An example of a date range that would be used by the application if the default end date is not selected is shown below. Yes, We wanted a date picker here too. But on the first run screen we cant create one. Hopefully the Power BI team will fix this. Once you are past the “first run” the date picker does show up.
Example: Attendance Start Date: 2/02/2020
Attendance End Date: 2/09/2020 **
Example: If the URL to your Classe365 tenant is https://evaluate.class365.com,

[** API key can be found by going to “Org Settings” > “API” and clicking [“Generate API Key”] **]
Done!
To Remove the application, use add/remove programs in Windows.
Need additional reports? Want custom reports? Want to change the existing reports? Need Power BI training? UniverseIT would love to help.
Leave feedback or request support on our support page.
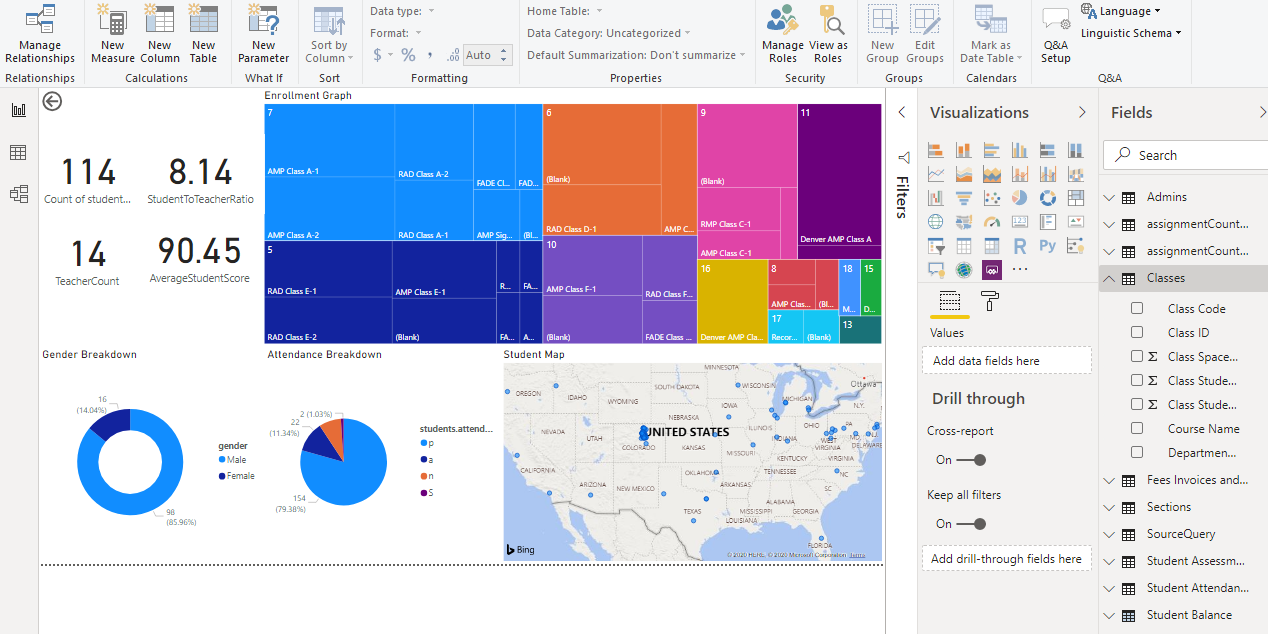
The UniverseIT Power BI Connector for Classe365 uses the default terminology found in Classe365 for the Power BI reports. If your institution’s terminology differs from the default terminology in Classe365, such as using the term ‘Instructors’ rather than ‘Teachers’ or ‘Learners’ rather than ‘Students’, or if your institution’s hierarchy has been customized in any way, such as utilizing the ‘Class’-level of the hierarchy for ‘Semester’, and you would like to change the terminology used in the Power BI reports to match your institution and your Classe365 tenant, here’s how to do it .
Changing data labels in Power BI is an extremely quick and simple process. There are a few different ways to go about making these changes. I will walk you through two of the most common ways in which you can change data labels in Power BI to match your institution’s terminology.
** Please note: Images included in this instruction are taken from an early version of the connector. Data fields and report layout & design may differ from the final version. However, these instructions will not be affected by any visual changes or changes made to the data. **
Method #1 – Rename columns in data tables
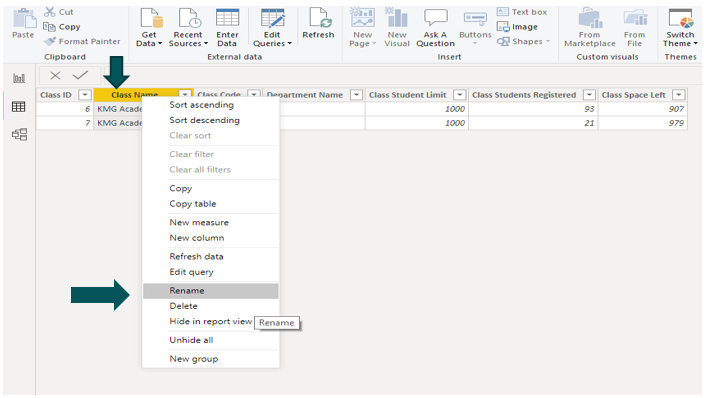
The first way in which to change data labels in Power BI is by going into the data tables. For this instruction, I am going to rename ‘Class Name’ to ‘Course Name’.
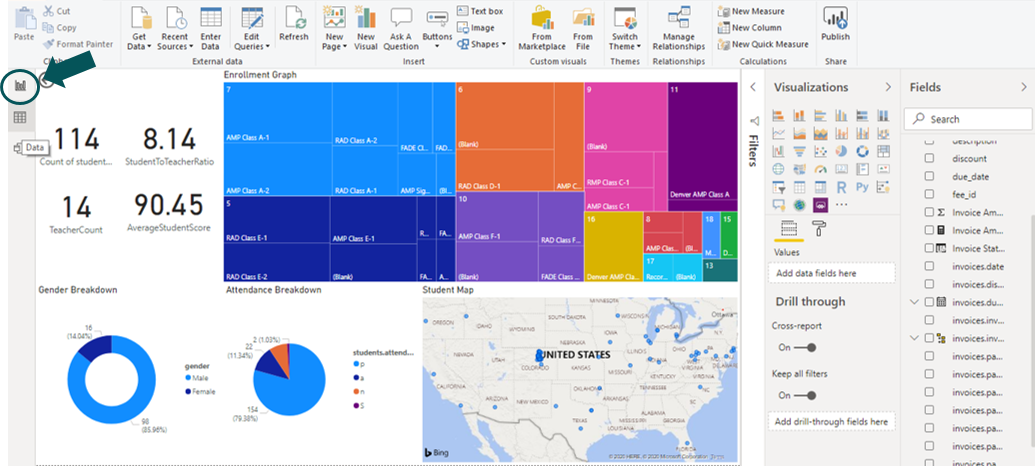
1.1 Click the ‘Data’ icon located on the left-hand side of the screen as shown in the image below
1.2 Once the data table appears, right click on the column header, and select ‘Rename’ from the contextual menu.
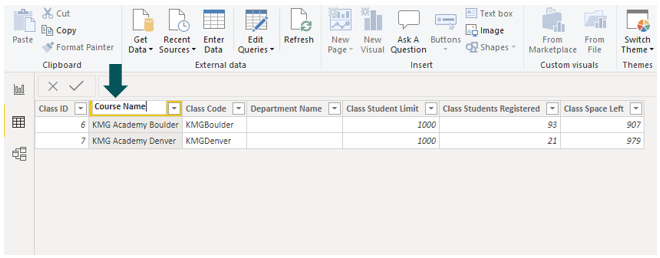
1.3 Once the label is editable, enter the desired name for the column. For example, I am renaming “Class Name” to “Course Name”. So, I would enter “Course Name” in the column header. Press ‘Enter’ once you are finished.
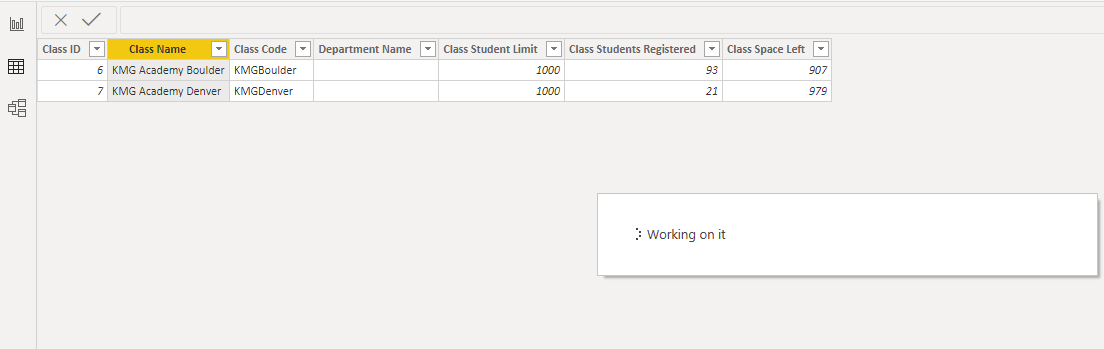
1.4 A message stating, ‘Working on it’ with a spinner will appear. This message indicates that Power BI is refreshing the data to include the change(s) made.
1.5 Once the reports are refreshed, the field name will now match the term you entered.
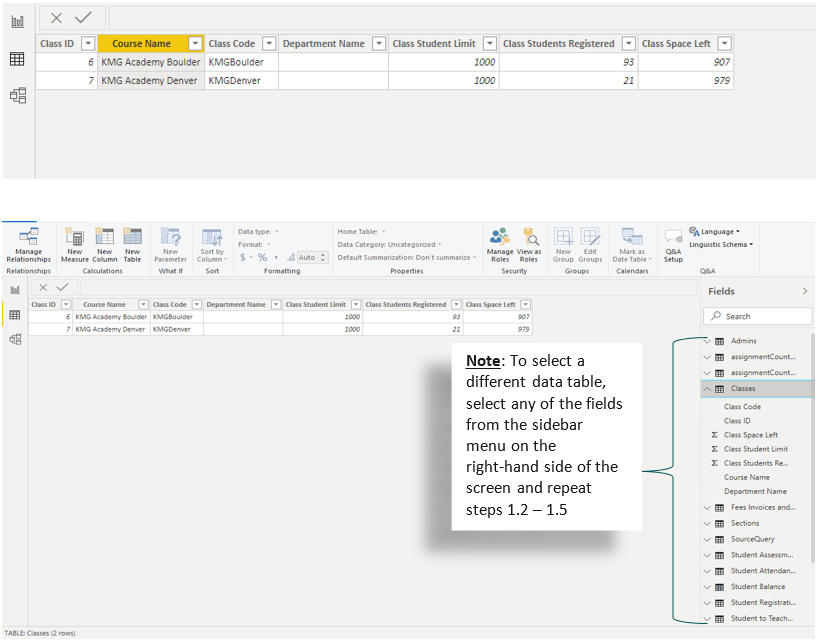
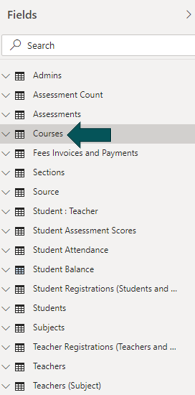
The second way in which to change data labels in Power BI is in the Fields sidebar menu. I will use the same data field as in the previous example, and will change “Classes” to “Courses”
2.1 Navigate to the sidebar menu on the right-hand side of the screen titled ‘Fields’.
2.2 Locate the field name you would like to change. Right click the field name and select “Rename”.
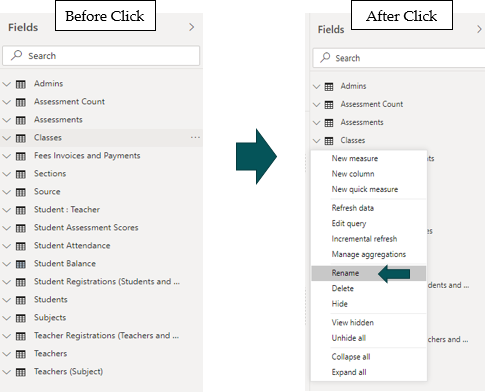
2.3 Select ‘Rename’ from the contextual menu and enter the desired term for the field, then press ‘Enter’.
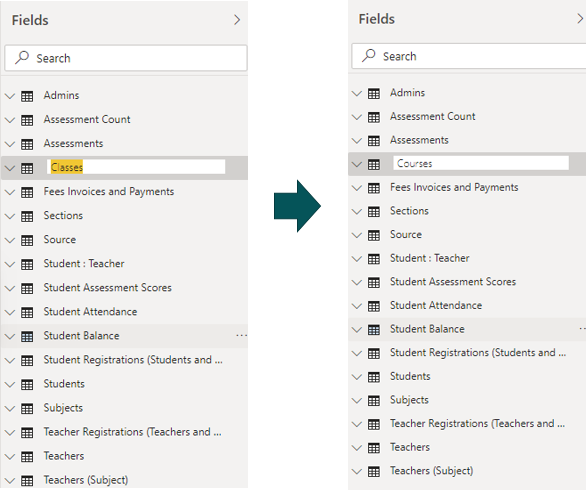
2.4 A message stating, ‘Working on it’ with a spinner will appear. This message indicates that Power BI is refreshing the data to include the change(s) made.
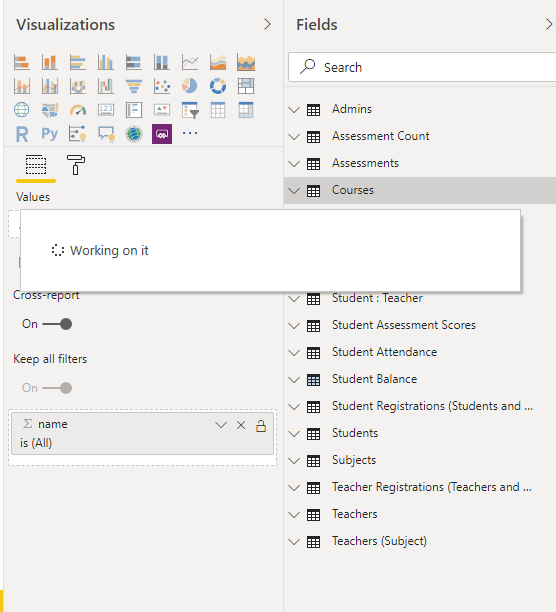
2.5 Once the reports are refreshed, the field name will now match the term you entered.
For support contact us on our support page.